Friday, June 10, 2011

Challah Bread! Mmmmm

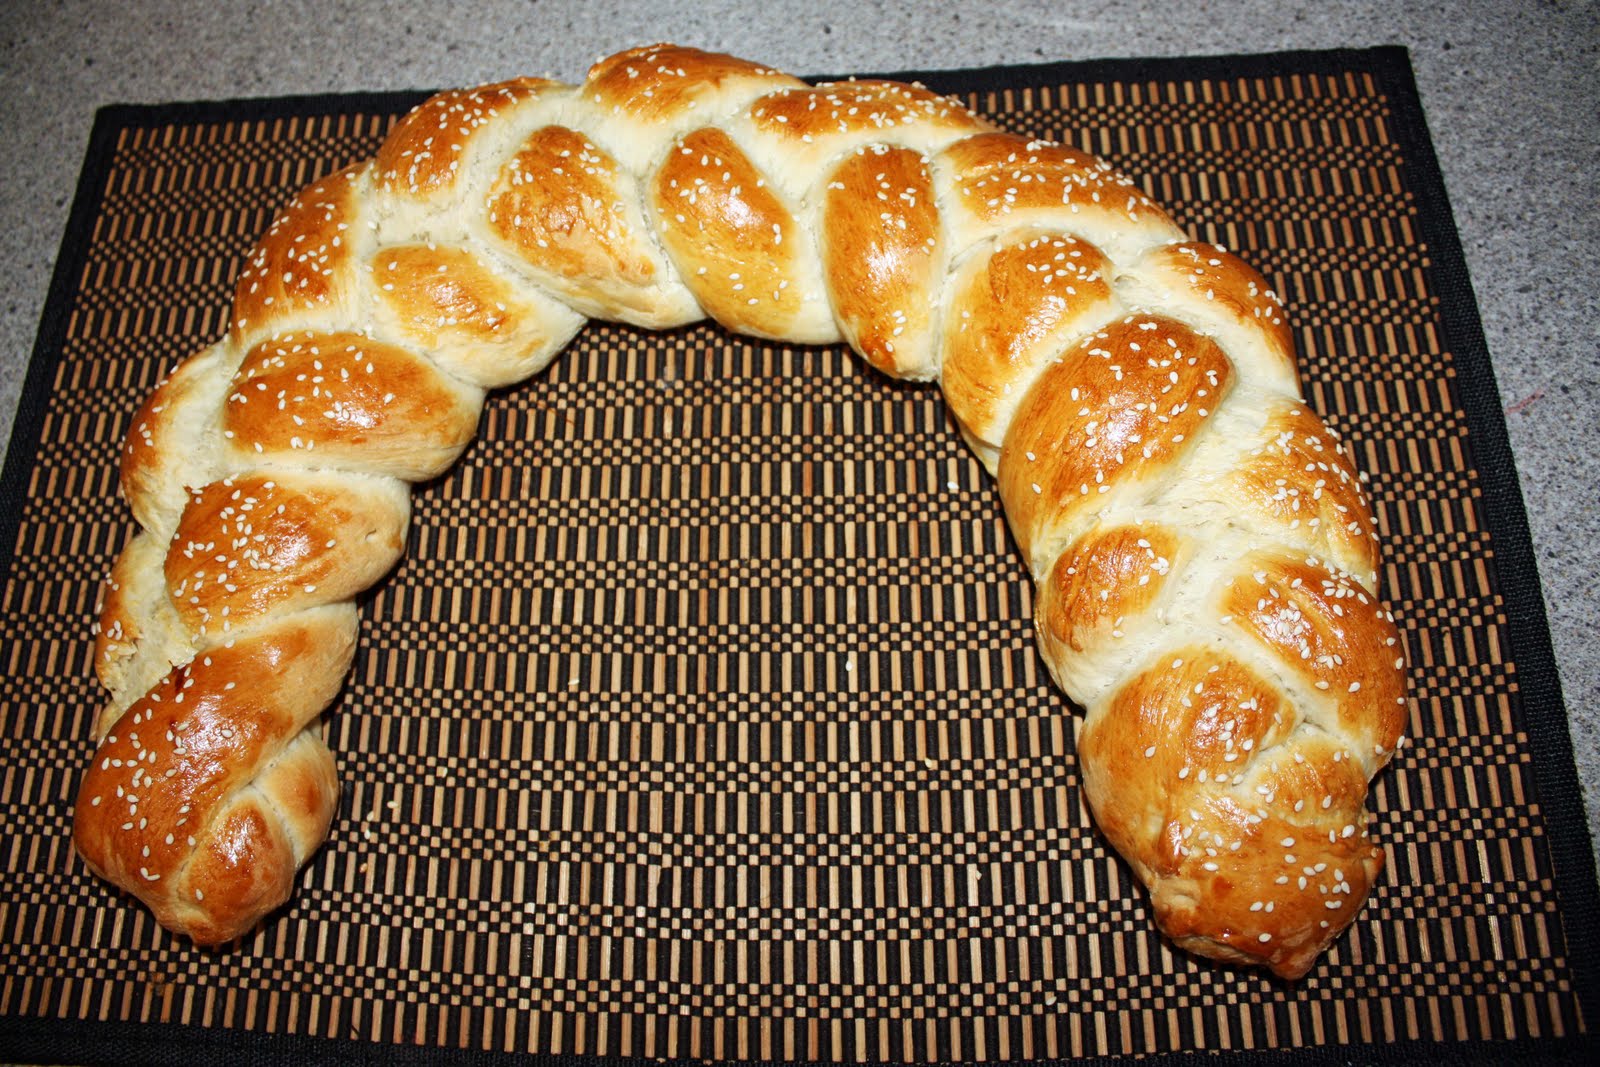
This is a fancy-dancy looking bread you can make when guests come over for dinner.....or on a Wednesday night while your husband is in a late study group meeting. It is again, like most of my recipes on here, simple to make - and does not require hours like some yeast breads. I wanted to impress my husband with it's cool braided design and it did the trick. He thought it looked all store bakery - I smiled :) This is the original "Egg Bread", but with 2 modifications, making it a "Challah"...which supposedly is a Jewish origin bread, traditionally made during holidays. Even though it looks like a lot of hard crust it is in fact very soft and moist. The brushing of egg yolk before baking gives it that nice golden look. It was especially yummy with butter, honey or Honey-Butter mixture. Mmmmmm Enjoy~


Recipe:
4 3/4 to 5 1/4 Cup All Purpose Flour
1 package of active dry yeast (or 1 Tbs yeast from jar)
1 1/4 cups Water
3 Tbs Sugar
3 Tbs of Margarine
1/2 tsp salt
2 Eggs

1. In a large mixing bowl stir together 2 cups of flour and the yeast; set aside. In a medium saucepan heat and stir water, sugar, margarine and salt until just warm (margarine starts to melt). Add water mixture to flour mixture along with eggs. Beat with electric mixer on low to medium speed for 30 seconds (or stir with fork/wooden spoon till all ingredients combined). Now add in as much of the remaining flour as possible. Don't over do it though! I believe I only used a little over 4 cups.

2. Knead enough of the remaining flour to make a moderately stiff dough that is smooth and elastic ( 6-8 mins) Shape dough into a ball and place in a lightly greased bowl, turning once to grease all sides. Cover; let rise in a warm place until double in size ( about 1 hour).

3. Punch dough down. Divide dough into thirds. Cover; let rest 10 mins. Roll each third into an 18-inch of so long rope. Place ropes on a greased large baking sheet, 1 inch apart; braid ropes. (now, I did not have a "large" baking sheet, so I braided my ropes on the counter and transferred it to my parchment paper, making a rainbow shape to fit on the sheet. ) cover, let rise in a warm place until nearly double (about 30 mins) ----brush braid with 1 beaten egg yolk (*gasp* I don't have a brush!....just use your hand! I would grab some yolk and just smear it across my bread....wash your hands before and after though! gross! :) ---sprinkle bread with sesame seeds and/or poppy seed.

(I had "rope" that was longer than the others...I cut it into 3 more little ropes and made a small braided bread-stick...hehe waste not want not!)

4. Bake at 375F for 25-30 mins -- or until bread sounds hollow when you tap the top...cover with tin foil if it is not done cooking and you don't want the bread to get to brown. My only took 22 mins to bake. Enjoy your awesome looking masterpiece!

(after baking)
Yumminess!

Saturday, June 4, 2011

*Cocoa Cats*

There is more than one way to skin a cat.... a cookie cat that is! That is exactly what Carter and I made this afternoon; some cute cocoa kitties! I was actually going to make a traditional Christmas Scandinavian treat tonight, but lacked one of the ingredients - so I perused the book and thought these looked fun- (Cats are one of Carter's favorite animals...) - They were super super simple to make and had minimal ingredients. They came out soft and moist, with a rich cocoa taste. I used some frosting from cookies I made the other month, that I had stored in the freezer (thus the blue). Carter kept pointing and say/signing Cat! Cat! (we do sign language with him) It was so darn cute. It was a hit with Don and Carter~ Success! Have fun making these critters (idea: use orange frosting for Halloween time! )


(I had some dough left over, so I made little paws! hehe)

Recipe:
  • 1/3 Cup Shortening
  • 1/3 Cup Butter (softened)
  • 3/4 Cup Sugar
  • 1/3 Cup unsweetened cocoa powder
  • 1 tsp baking powder
  • 1 Egg
  • 2 Tbs Milk
  • 1 tsp Vanilla
  • 1 3/4 Cup all-purpose flour

1. In a large mixing bowl, beat or stir the shortening and butter together till creamy and smooth. Add sugar, cocoa powder, and baking powder. Beat until combined. beat in egg, milk and vanilla until creamy. Add flour and stir till fully combined.

2. Now the recipe calls for chilling the dough for about an hour or 2 for it is easy to handle. I decided to just add a little extra flour to make the dough slightly tougher and just roll out and shape. ....So your choice! :) Roll the dough and using a cat cutter, cut out the animals. Now, another side road I took...I did not have a cat cutter! haha...but I did have a large circle. So I cut out large circles and then took a knife and cut out a triangle on top for an ear then line and another triangle for the other ear. Then just chiseled off the edges to make triangle shaped cheeks. :) It worked...
(uncooked kitties)


(cooked kitties)

3. Place cookies in a baking sheet, (parchment paper!) Bake cookies at 375F for about 7-9 mins. (or until edges are firm and bottom is light) 7 mins worked perfectly for my "cats". ....Take the *cats* out and allow to cool fully. Then use your icing skills to create the purr-fect feline faces! I used my icing recipe found in my previous post for black belt cookies

Don and Carter approved! They both gobbled them up..and, of course, a cat wouldn't be complete without a large glass a milk by their side. Yum Yum....


however: I would have liked them more if they were ginger, and not cocoa. I ate one. That was enough for me!

Tuesday, May 31, 2011

Pumpkin Cookies and Frosting

Now I got this recipe back in college from my room-mate Valerie. They are sooo moist, soft and flavorful! This is a must during the Fall season...and when I need a little holiday feel during the rest of the year. I was browsing through my pantry the other day and saw a can of pumpkin and thought it needed to be put to work. The outcome? YUMMINESS.


Cookie Recipe:
2 cups Flour
1 tsp Baking Powder

1 tsp Baking Soda
1 tsp Cinnamon
1 Cup Sugar

1 Cup Butter
1 Egg
1 Cup Pumpkin
1 tsp Vanilla

Frosting Recipe:
2 Tbs Butter
4 Tbs Milk
1/2 Cup Brown Sugar
1 Cup Powder Sugar
1 tsp Vanilla

1. Preheat oven to 350F

2.Cream butter, sugar, egg and vanilla -- sift dry ingredients and slowly add to the creamed ingredients.

4. Spoon onto baking sheet (greased, or layered with parchment paper)

5. Bake for 10-12 mins (don't over cook! Watch the cookies!!)

6. Transfer to wire rack -- top with frosting when cooled.

Wow, that was simple, eh? Go enjoy....in moderation!!

Strawberry Shortcakes and homemade Whipped Cream

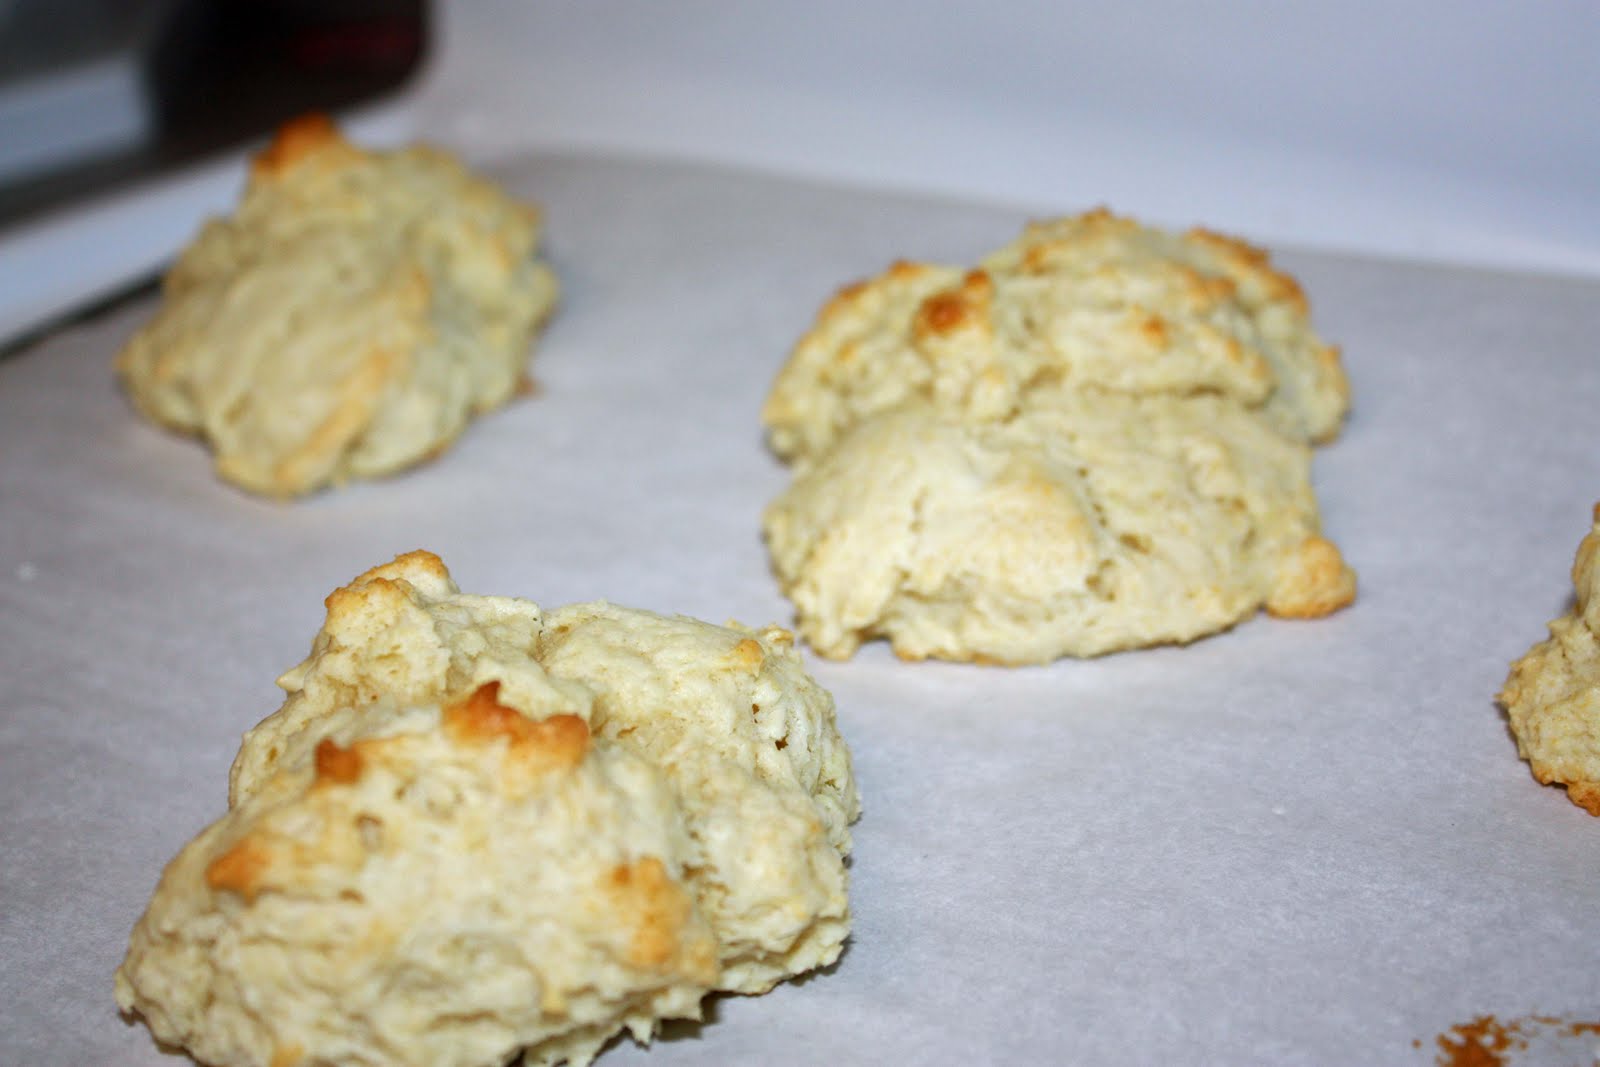
Mmmm you know summer is here when you start craving strawberry shortcakes! We go through a lot of strawberries in our house and this one particular day I felt like making some yummy shortcake. I flipped open my Better Homes and Garden cook book and found just the thing. It was delicious! The cake was fluffy and sweet - perfect when served warm with a nice scoop of sliced strawberries and whipped cream on top....Mmmmm I want one right now!
It was a simple recipe and you just plopped the batter onto a cookie sheet and baked. Of course they won't look like your processed little shortcakes you buy in the packets at Wal-Mart...these are much better!

Recipe:
1.5 Cups all purpose Flour
1/4 cup Sugar
1 tsp Baking Powder
1/4 tsp Baking Soda
1/4 tsp Salt
1/3 cup cold Butter
1 Egg
1/2 cup Dairy sour cream
2 Tbs Milk

1. Preheat the oven to 400F. Lightly grease a baking sheet (or use parchment paper!); set aside. In a medium bowl combine flour, sugar, baking powder, baking soda, and salt. Using a pastry blender, cut in butter until mixture resembles coarse crumbs. In a small bowl combine egg, sour cream, and milk. Add flour mixture, stirring with a fork until moistened.

2. drop dough into eight mounds onto baking sheet. Bake for 12 to 15 mins or until golden (dont over cook! Start low, like 11 mins... keep watch) --- Transfer to wire rack, let cool.

Serve with strawberries and Whipped Cream. ....Now, you can use the store bought whipped cream, or...make your own!! It's fast and easy - and tastes great!

Recipe for Whipped Cream:
In a chilled mixing bowl add 1 cup of whipping cream, 2 Tbs sugar, and 1/2 tsp vanilla. Beat with an electric mixer on medium speed until soft peaks form (or, for about 10 mins by hand with a whisk) That's it. Now go and enjoy! YUM!.... sit outside and eat...it makes it all that much more pleasurable.


Lots O'Meat Lasagna

Oh Paula Deen, you are my fatty southern food cooker. I love you! I wanted to make a lasagna one night, because I figured it would have ingredients Carter might eat and enjoy - so I found this recipe by Paula Deen. She is an excellent cook, but not a healthy one. Oh well...it's good to have a pound of meat on your ribs (or 2, or 6...)! So, yes the lasagna was a success and Carter and Don both loved it. The best thing about the dish was that it lasted a LONG time...I mean, long time. - and made for great Tupperware lunches for Don to take to school. This is not your typical Lasagna, in that it has a variety of meat wedged all so fatly within it. I believe "portions" are the key to eating such things as this... enjoy!! :D

Recipe:
  • 1 1/2 pounds ground chuck
  • 1 pound ground Italian sausage
  • 1 onion
  • 2 cloves garlic, minced
  • 2 teaspoons ground oregano
  • 1 teaspoon ground basil
  • 1/4 teaspoon salt
  • 1/4 teaspoon pepper
  • 1 (14.5-ounce) can diced tomatoes with basil, garlic, and oregano
  • 2 (15-ounce) cans tomato sauce
  • 1 (6-ounce) can tomato paste
  • 1 1/2 cups small curd cottage cheese
  • 1 (5-ounce) package grated Parmigianno-Reggiano
  • 2 tablespoons freshly chopped parsley leaves
  • 2 large eggs, lightly beaten
  • 9 oven-ready lasagna noodles
  • 2 (8-ounce) packages shredded mozzarella
  • (haha, uhmmm yeah. A lot of good stuff, eh?)

1. Preheat oven to 350 degrees F. In a large saucepan, combine ground chuck, sausage onion and garlic. Cook over medium heat until meat is browned and crumbled; drain. Return meat to pan and add oregano, basil, salt and pepper. Add tomatoes, tomato sauce and paste. Bring to a boil, reduce heat and simmer 30 to 45 minutes.

2. In a small bowl, combine cottage cheese, Parmesan, parsley, and eggs.

Spoon 1/4 of sauce into bottom of a 13 by 9 by 2-inch baking pan. Place 3 uncooked lasagna noodles on top of sauce. Do not overlap noodles. Spread 1/3 of cottage cheese mixture over noodles, top with 1/4 of sauce and 1/3 mozzarella cheese. Repeat layers, ending with sauce, reserving 1/3 of mozzarella cheese.

3. Bake 45 minutes. Top with remaining cheese and bake 15 minutes or until hot and bubbly. Let rest 10 minutes before serving.

Whew! You're done my friend! Now go enjoy your efforts! Just remember, portions are key to eating dishes like this! Give yourself about a closed fist size - then load your plate with a nice salad, veggie and or fruit. This should be made and eaten on occasion.

Nun's Puffs

So you're probably thinking, what in the world in a *Nun's Puffs* haha...I was too! I was making dinner one night (see below post, Swiss Steak) and wanted to make a bread - but knew I did not have time to make a yeast bread and do the whole process of rising, etc, etc... so I searched through one of my cook books for a bread recipe that was quick. I saw these and thought, hmmm that looks interesting! I am glad it included a picture (which normally sell me to make the recipes in the first place, it's hard to make something when you don't know what it is supposed to look like afterward!) The prep time listed was about 25 mins, and the bake around 30. Sounds good to me! Better than a few hours! So that is where my Nun's Puff adventure started...and since I am posting all these extremely late I have since made this recipe about 6 or 7 more times! Yes, it is that good. They remind me of a puffy crepe, or kind of a German Pancake type taste. You make it on the stove, has very few ingredients, and you cook them in a muffin tray! Served hot with honey...or strawberries and whip cream. My husband can't get enough of them! I honestly think they are good, but I can only eat about 1. Just not my thing.

Recipe:
1/2 Cup butter
1 Cup Milk
3/4 cup all-purpose Flour
4 eggs
1 Tbs Sugar
Honey (optional - but recommended!)

1. Preheat oven to 375F. Generously grease twelve muffin cups, including the edge and around the top of each cup; set aside. In a medium saucepan melt butter; add milk. Bring to boiling. Add flour all at once, stirring vigorously. Cook and stir until mixture forms a ball that doe snot separate, Remove from heat; cool for 5 mins. (I actually take the pan off the heat and add the flour and stir until it forms a ball)\

2. Add eggs, one at a time, beating for 1 min with a wooden spoon after each addition or until smooth. Divide dough evenly among the muffin cups. --filling the cups about 2/3 full. Sprinkle with sugar ((which we have never done, but I am sure tastes great! - trying to reduce sugar for us)

3. Bake about 30 mins or until golden brown and puffy. remove from pan. Serve immediately - serve with honey!! ...also, I never went the full 30 mins. Normally 23-25 mins is good.
Enjoy!


Previous post had the Swiss Steaks I made with the Nun's Puffs. :)

Swiss Steak

Mmmhmm my husband loved this! The flavors were SO good, and the meat extremely tender! It was easy to cook and did not require any foreign ingredients/spices! I love when I can just open up a recipe and find that I have all the ingredients already...love that! :)


Recipe:
  • 1 lb boneless beef round steak (cut 3/4" thick if needed)
  • 1 Tbs All-Purpose Flour
  • 1/4 tsp Salt
  • 1/4 tsp black pepper
  • 1 Tbs Cooking Oil
  • 1 (14.5oz) can dice tomatoes with basil/garlic/and oregano - undrained
  • 1 small Onion, sliced and separated into rings
  • 1/2 cup sliced celery
  • 1/2 cup sliced carrot
1. Trim fat from meat. Cut meat into four serving-size pieces. Combine flour, salt, and pepper. With a notched side of a meat mallet, pound flour mixture into meat. (*note: I do not have a meat pounder (gasp!) - but what I do that works well is I take a knife and jab the meat a few times, than place the meat and ingredients into a large sealed plastic bag and shake around and coat real well, pounding in with my hand and squishing, etc...)

2. In a large skillet brown meat on both sides in hot oil. Drain off fat. Add undrained tomatoes, onion, celery and carrot. bring to boiling; reduce heat. Simmer, covered, about 1 and a quarter hours or until meat is tender.

3. Hey, guess what. No step 3. You're done! Yes, it was that easy. Nice job~ I served mine with mashed potatoes, green beans and Nun's Puffs! (see recipe post for Nun's puffs)