Showing posts with label Mexican. Show all posts

Monday, September 12, 2011

Chili Pasta Skillet

At the end of each month I try and print off a calendar (has some nice printable free ones "here") and fill eachday with a potential dinner. It takes the guess work out of my day and I can go to the grocery store once a week to get all the ingredients I need. I have found this to not only cut down on traveling, and the hassle of lugging my spunky kid through the aisles in a cart, but overall it saves money! I recommend highly...

SO, while I was in one of my planning moods and writing out the rest of September meals, I came across this one that sounded interesting, and had little prep time! I gave it a shot, and it was not half bad. Not fantastic, but not bad. ...and be prepared, it makes a lot! We ate it and thought "okay, that was different (with the pasta in it)" and thought nothing much of it. I had it a few times as a left over for lunch and you know what? It is much better as a leftover! (to me at least). Scoop it out and warm it up, sprinkle some cheese, plop a little sour cream and grab a hand full of tortilla chips. Not too bad at all...


Recipe:
1 lb Lean Ground Beef
3/4 Cup Chopped Onion
1 (15-15.5oz) Can of Black, Red, or Kidney beans
1 (14.5oz) can of diced Tomatoes, undrained
1 (8oz) can of Tomato Sauce
1 (4 oz) can Diced Green Chile Peppers, drained
1 Cup Elbow Macaroni (4 oz)
2 to 3 tsp Chili Powder
1/2 tsp Garlic salt
1/2 Cup of Shredded Cheese

1. In a large skillet cook mean and onion until meat is brown and onion is tender. Drain off fat.


2. Stir in beans, undrained tomatoes, tomato sauce, chile peppers, macaroni, chili powder, and garlic salt. Bring to boiling; reduce heat. Simmer, covered (I did not have a big enough cover, so left without) about 20 mins, or until macaroni is tender, stirring often.

3.Remove from heat; sprinkle with cheese/ Cover and let stand for about 2 mins, or until cheese melts.
(note: without cheese on)

That's it! You're done friend! Now try it with the yummy cornbread recipe below this post! :-)

Monday, March 28, 2011

Toasted Tortilla Chicken Enchilada (kid approved!)

I have been trying to figure out stuff that Carter would like to eat. Some friends sent me a great line of ideas and when I was browsing different recipes the other day I saw this and thought Carter might like it! It seemed super easy and worth a shot. I perhaps added a little more cheese than needed, and scraped a lot off when I gave it to Carter. They are called Oven cooked tortilla chicken enchiladas. Super simple! Don came home late that night from school and took it upon himself to eat all the remaining leftovers. So apparently they were good enough for a full grown man too (though, I think Don would eat just about anything... must be that lack of a Y chromosome...)

Recipe:
2 Burrito sized Tortillas
2 Chicken breasts
Sour Cream
Cheese
1 Can Green Enchilada Sauce
Olives

1. Turn the oven on to 400F. After it is heated place 2 tortillas on a cookie sheet and place in the oven for about 10 mins, or until golden brown and crunchy.

2. Cook your 2 whole chicken breasts in a skillet until almost all white, then add your can of enchilada sauce. Slice into the thickest breast to see if it is cooked thoroughly, turn the heat down to a simmer and take your chicken and shred it - Placing the shredded pieces back into the skillet. Turn the temp back to medium and stir around all the chicken and sauce. After it is all well coated, take the skillet off the heat.

3. Spread sour cream over your now crispy tortillas (spread generously- then add the chicken evenly over the top. Sprinkle olives evenly, then add cheese.

4. Pop those yummy looking tortillas back in the oven for about 5 mins (until cheese is melted well) and TADA, you have a kid friendly meal! I used a pizza roller and sliced up the tortillas and Carter and I sat down to eat. When Don got home he smothered his in Salsa. Add whatever you would like. ENJOY!

Thursday, February 3, 2011

Apple-Maple Claws...oh, and a burrito.

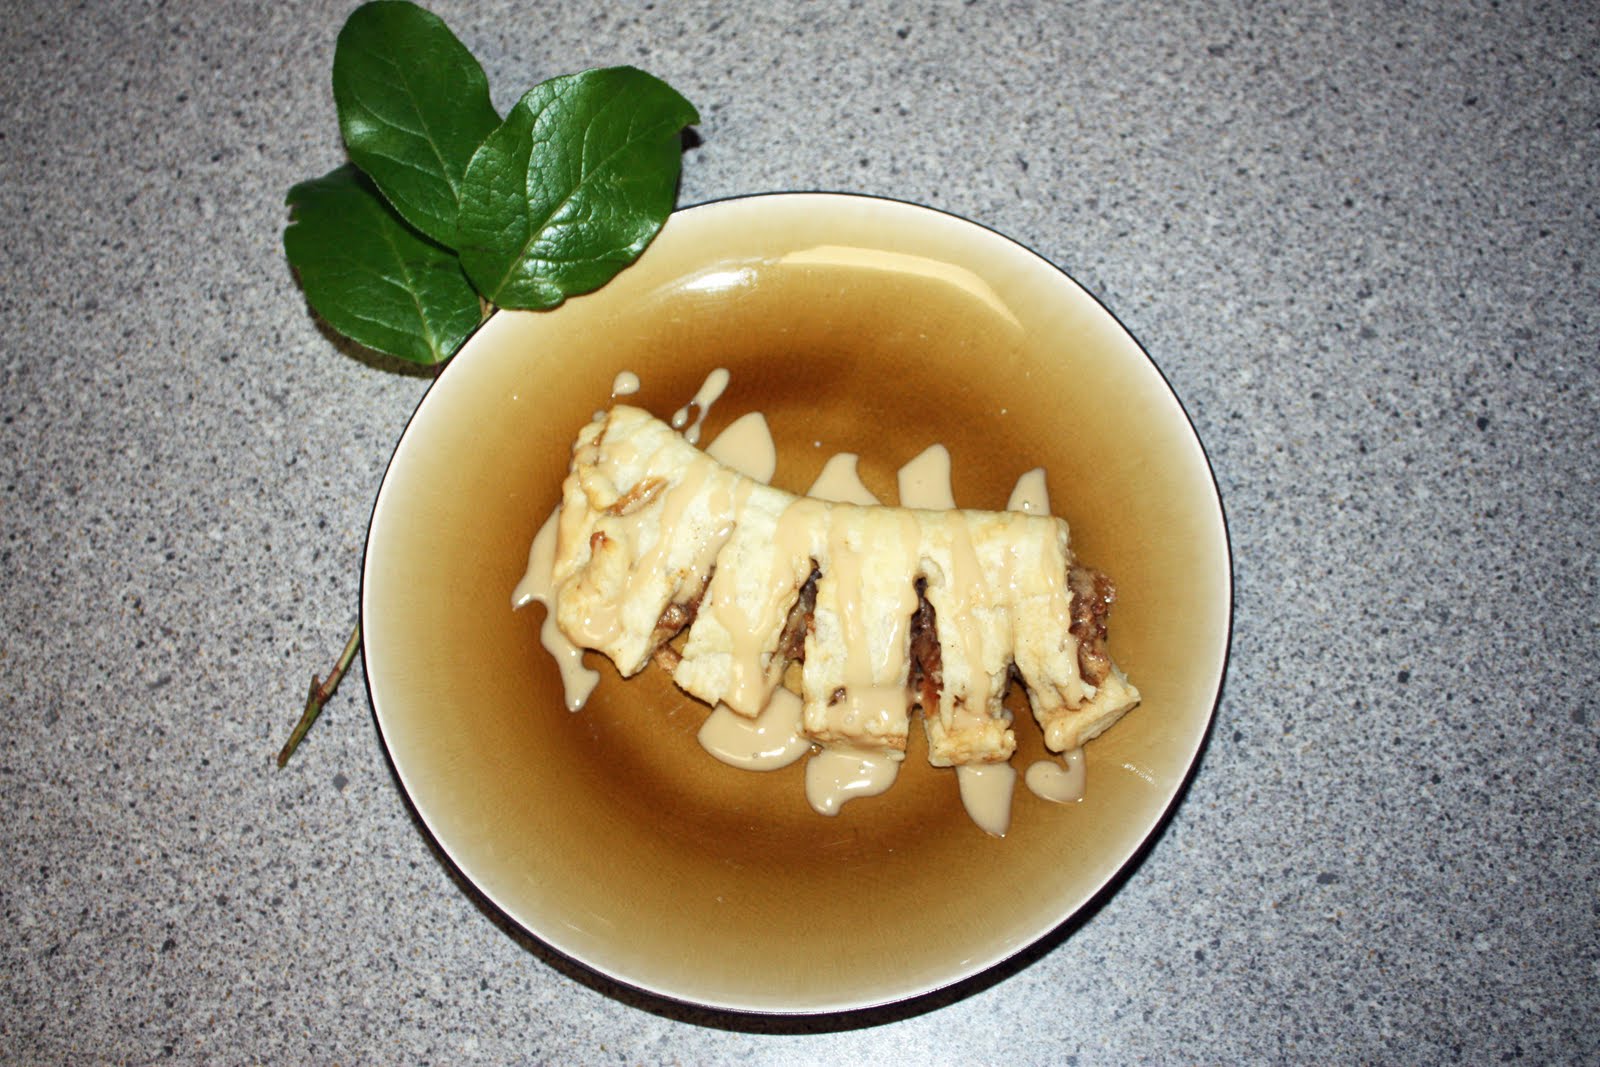
Yesterday I said that I was making a special treat. Well here it is! Yum~

This little beauty is called an "Apple-Maple Claw" and tastes pretty darn scrumptious! However, the work involved was a little extensive - I think mostly in part because of my 50% effort while playing with Carter. I made the quick-method croissant dough recipe (which really is not all that *quick*) and had to let chill till the next day (4-24hrs). Here is the recipe:

Croissant Dough

1.5 Cups Cold Butter
4.5 Cup All Purpose Flour

1 Package of dry yeast (I have the jar, so 1Tbs)
1 and 1/4 Cups Milk
1.4 Cup Sugar

1/4 tsp Salt

1 Egg
4th to a half Cup All Purpose Flour


1. Cut the butter into thin little slices and mix that around 3 cups of flour. After they are all mixed and separated, put the bowl and mixture in the fridge to chill.


2. For the dough, combine the remaining 1.5 cups flour and the yeast; set aside.
In a sauce pan heat and stir milk, sugar and salt just until warm (120-130F with cooking thermometer). add to flour and yeast mixture. Add Egg. Mix together well with electric mixer or wooden spoon.

3. With wooden spoon, stir chilled flour/butter mixture into dough until flour is moistened (butter chunks will remain)

4. Okay, now most places will say flour a surface real well or use a pastry cloth --well my little trick is Parchment paper for everything! The clean-up is so much better when you use this stuff. Now get your parchment out, flour it up a little and turn the dough out onto the surface. with floured (clean) hands gently knead the dough for about 8 strokes. Using a well floured rolling pin (to prevent sticking) roll dough out into about a 21X12" rectangle. (I again use parchment paper instead of flouring my rolling pin. Sprinkle a little flour on the dough and layer a parchment paper on top...then roll away!)

Rolling Process

5. Now fold the dough into thirds. (Take left side, fold it to middle, then take right side and fold it to middle - like a letter going into an envelope.). Loosely wrap that in plastic wrap and chill in the fridge for 1-1.5hours. ....or 20-30mins in the freezer. You want it firm but not excessively stiff.

6. Now roll the dough back out into a 21X12" rectangle and then fold back into thirds. Turn the dough around and re-roll it back out in a 21x12" and then fold back into thirds. Cut dough evenly down the middle and place in two separate plastic bags. Inflate the bag a little to allow the dough room to rise. Chill dough for 4-24hrs.
Whew! Now you're done with the most time consuming portion!

Now for the filling I made to go inside the dough I doubled what the recipe called for. You might not feel the need - but I really wanted to load those puppies up with apple goodness! So, for the following recipe double if you desire. :)
FILLING RECIPE:
1.5 Cups Chopped and Peeled Apples (I used granny smith green)
2 Tbs Sugar

1/2 tsp Ground Cinnamon

1/4 Cup Butter

1/2 Cup Powdered Sugar

2 Tbs all-purpose Flour
2 tsp Vanilla

1 tea Maple flavoring


1. In a med. saucepan combine and apples and sugar. Heat slowly until liquid accumulates. Bring mixture to boiling. Reduce heat; cover and simmer for 8 to 10 mins or until the apples are tender. Uncover and simmer for 3 mins more or until most of the liquid is evaporated. Stir in cinnamon.

2. In a medium mixing bowl beat butter, powdered sugar, flour, vanilla and maple flavoring with an electric mixer on medium speed for 2 to 3 mins or until light and fluffy - set aside.

3. Now take your dough you made and chilled. Roll into 12" square. Cut each square into three 4 inch wide strips (6 strips total). Now take the maple vanilla mixture and spread it across the strips. (This is where you will have to delegate how much goes on each...thus the reason why I doubled the recipe) Now delegate yet again the apple cinnamon mixture over the mixture on the strips. Fold the strips lengthwise in half to cover the filling. Pinch the edges to seal. Cut the strips into 3 4-inch long pieces. Make 4 or 5 evenly spaced cuts into each piece. Snipping from the sealed edge almost to the folded edge. Place two inches apart on un-greased baking sheet (again, I used parchment paper over my cooking sheet...no mess! yes!!). Curving slightly to separate slits. Cover and let raise in a warm place until nearly doubled. Approx. 45-60 mins. (Now I did not do this. --I just threw it in and baked.)

Pinched and separated

Ready for the Oven
All Done!


Bake in oven at 375F for 11-15 mins. Or until pastries are golden.
Maple Glaze:
In a small mixing bowl combine
1 Cup powdered sugar
1/4 tea maple flavoring
1-2Tbs milk
Enough to make a glaze that is easy to drizzle.

Now serve warm, alone or with ice cream. Or cool and seal in freezer bag for another day. Good Job!

P.S. Don't Stuff Too much....my second batch that I generously loaded sort of spilled their "guts" while cooking. Whoops. Oh well, still tasty and good with ice cream!

Always wear your seat belt
-----------------------------------------------
Don tried it out....yummmm
Carter Tried it out....kind of Yummmmm


Oh, and I also made a less-than fabulous Burrito for Don and I to eat. Sorry, nothing special here. It didn't even have meat in it! Just take a tortilla, layer some re-fried beans, cheese, salsa, sour cream..whatever else and cook or microwave. Some home maker uh? haha


Monday, January 31, 2011

Home made tortillas and chili

(from yet another entry on my main web blog)
Mmmmmm I thought! That would be good! So I cooked up a pound of lean hamburger, added some chili spices, black beans, tomatoes and green chilies. Topped with some cheese (I love cheese!) Than I made the tortillas, which were super easy!
  • 3 Cups of Flour
  • 1 1/2 tsp. salt
  • 2 tsp Baking Powder
  • 3/2 Cup shortening (crisco)
  • 3/4 Cup Hot water
Mix the first 4 together (flour will be crumbly) than add the water. Stir, knead etc.. till it is slightly elastic. Have a large skillet hot on medium heat. Divide dough into how many balls you want, depending on the size of the tortilla you want to make. Take a ball, roll it out very very thin (1/8 inch?) and throw it onto the hot pan. Wait till it starts to bubble up a little, or till your desired golden/browness. Flip it over, same on other side -- and then you're done! Repeat till all the dough is done. Simple Simple. And I LOVE that no oil is involved. Enjoy!
(tip: I like my tortillas thicker and soft - so don't roll out as thin and cook for slightly less time)
Here are Mine...