Monday, September 12, 2011

My "Nine-Eleven" Bread

Okay, so I was going to make my normal White Bread from a previous post (click here) but I thought, since it was Sunday Sept. 11th (10th anniversary of the terrorist attacks on the USA) - I would make it Red White and Blue! So here ya go!


Recipe:
(makes 2 loaves)
5 3/4- 6 1/4 Cups all purpose flour
1 package of active dry yeast (or 1 Tbs of active yeast from the jar -- this is what I do)
2 1/4 Cups of Milk
2 Tbs Sugar
1 Tbs Butter
1 1/2 Tsp Salt
Red and Blue food coloring

1. In a large mixing bowl combine 2 1/2 Cups of flour and the active yeast; set aside.
In a medium sauce pan heat and stir milk, sugar, butter, and salt just until warm (120-130F) and butter almost melts. Add milk mixture to dry mixture and stir with wooden spoon (that's what I do) - or beat with electric mixer on high for 3 mins (scraping sides).
Now divide the dough among 3 bowls, evenly. In bowl 2 add red food coloring, in bowl 3 add blue food coloring to the dough. Now Add about a 1 cup of flour into each and stir. ((Add flour slowly, don't over do it and make a hard dough...not fun! Add more flour if 1 cup does not do it...)))


2. Turn dough out into a lightly floured surface and knead in the best you can to made a moderately stiff dough that is smooth and elastic (6-8 mins) Shape doughs into a ball and place in a lightly greased bowl - turning once to grease the surface of the dough. Cover; let rise in a warm place covered with a towel for about 1 hour, or until double in size. (45-60 mins).

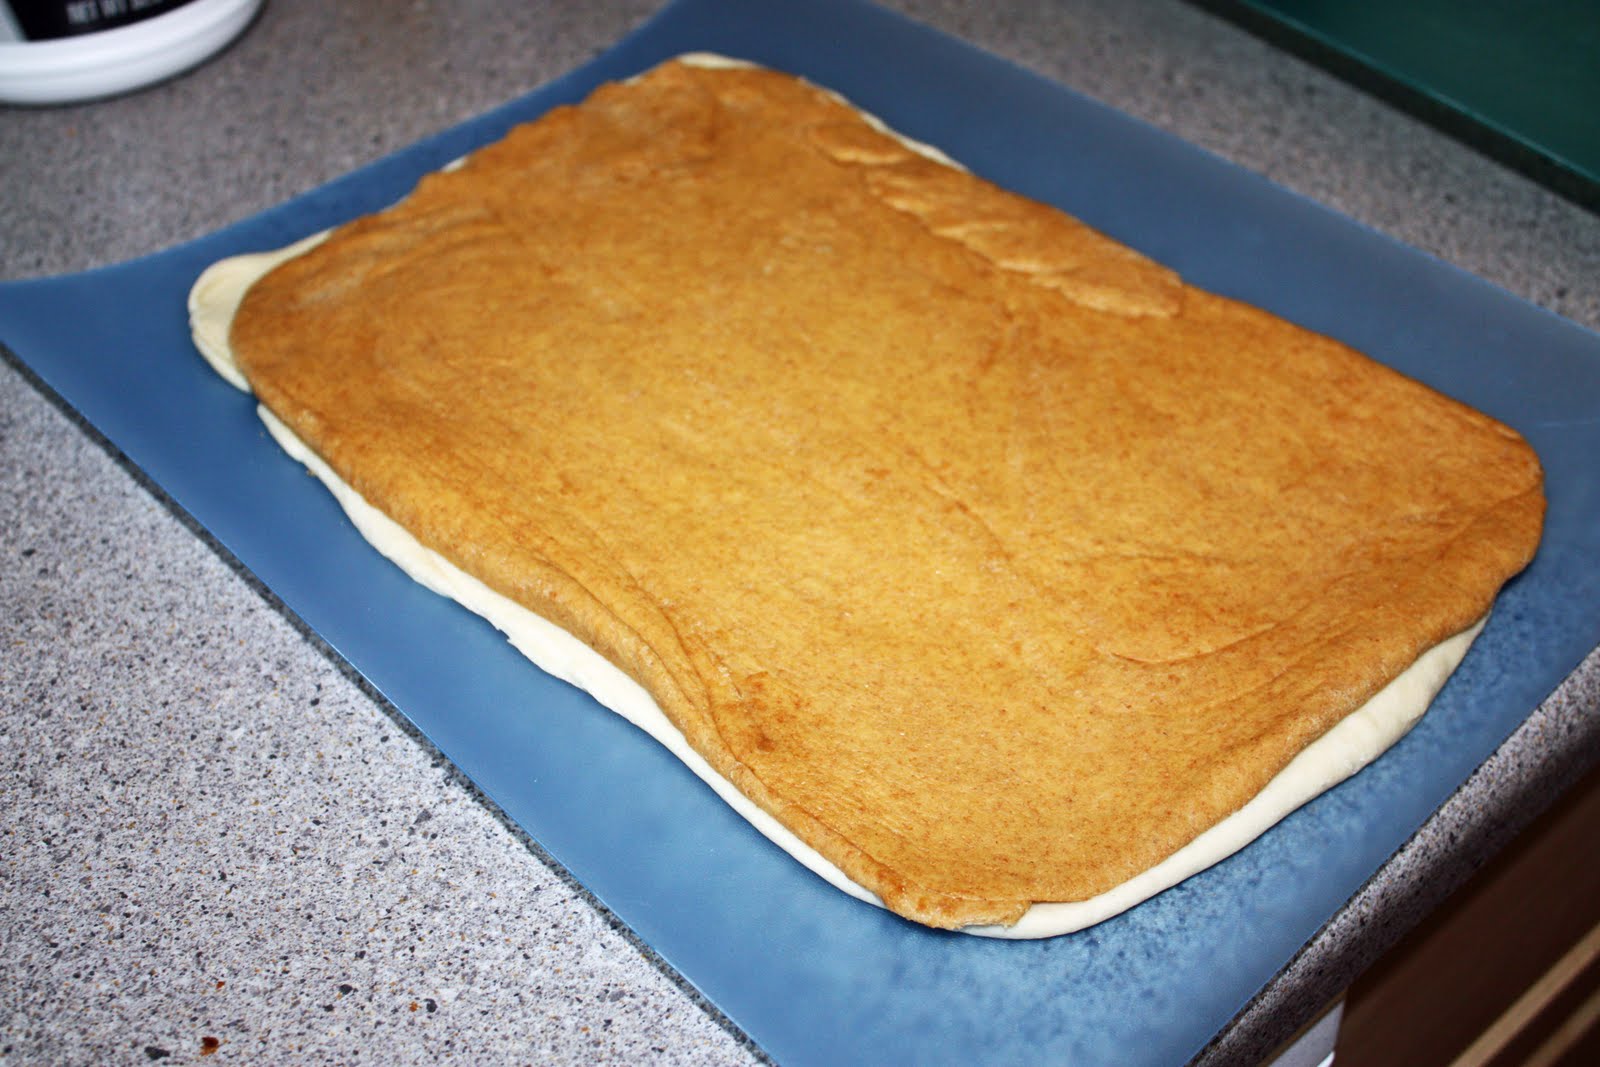
3. Punch doughs down turn dough out into a lightly floured surface. Roll each dough out like I did in my Marble Bread recipe (click here). Cover and let rest for about 10 mins. Meanwhile lightly grease 2 8x4x2" loaf pans.

4. Now place the red rolled out dough on top of the white dough, and then the blue dough over the red. Making a "sandwich" appearance. Start at one end and roll the doughs up into a log.


5. Cut the log in half and place in 2 greased loaf pans. Allow to rest and rise another 10 mins.


6. Bake at 375F for 30-40 mins, or until bread sounds hollow. (tap the top of the bread with your fingers). Watch the bread though!! Don't over cook.... -- if you find the top browning to quickly simply cover loosely with tin foil.

7. Remove from pans, and cool on wire rack.

I hope this was fun for you to make :) Now go grab from butter and honey! Yummmm

Italian Herb and Garlic Chicken

I had another meal on the dinner menu that night, but forgot about the ahead of time prep it required and had got caught up with other things that evening. I pulled a Lipton box out of the pantry (always a nifty thing to have in there!) and decided to try it out. I thought it was okay, not good but not bad....however my husband really liked the flavor and gave it a thumbs up. I'll make it again if he remembers it.... :-)

Recipe:
3-4 Boneless Skinless Chicken Breast
1 Packet Lipton Savory Herb & Garlic Dry Soup Mix
()
1/3 Cup Water
1 Tbs Olive Oil or Vegetable Oil
1 Can of Diced Tomatoes
1 Cup Mozzarella Cheese


1.Preheat oven to 400 degrees.

2. Put chicken in 9x13 or 8x8 pan (which is what I did, since I only used 3 breasts). Pour can of tomatoes over chicken.

3.Mix water, oil, and soup mix. Pour over chicken and tomatoes.


4. Bake for 25 minutes. Put cheese on chicken and bake another 5 minutes or until chicken is cooked and cheese is melted.


Homemade Cherry Pie and Crust

Like I had mentioned in my Pumpkin Pie post, I was on a pie kick and this Cherry Pie was one of my choices to make. I used a different recipe for the crust (pumpkin pie one here) and I think I like this one a lot better. It was from an Amish Book...and my experiences with the Amish and Mennonites have been wonderful, especially in the food department! So I was very excited to try it out. Yum Yum Yum!


Recipe for Crust and Filling:

3 cups all-purpose flour

1 teaspoon salt

1 cup lard (I used Crisco... no lard in my pantry!) ;)

1 large egg

1/3 cup cold water

1 tablespoon apple cider vinegar

2 (21oz) "Comstock" Cherry Filling cans

1.In a large bowl, combine the flour and salt. Stir to blend. Add the lard (crisco) and rub it into the flour with your finger tips until the mixture resembles coarse crumbs. Add the egg, water, and vinegar and stir with a fork until the dry ingredients are moistened. Form the dough into a ball and divide that into 2 balls. Form a ball into a disk and roll it out to a 1/8-inch thickness on a floured surface.

2.Fit the dough into a 9-inch pie pan and trim the edges to a 1-inch overhang. Fold the dough under and crimp the edges. (NOTE: You can use my method from the Pumpkin Pie Post)

3. --save the trimmings to make a design if you want on your pie. I took a toothpick and stenciled out 2 cherries and cut them out with a knife. I am quite proud of myself for it! hehe

4. Place the Cherry filling in the pie pan -roll out the other ball of dough and place over the filling (or, if you are doing lattice design, cut the dough into strips and lay over the filling accordingly). Trim the edges and seals the pie crusts together. You can make a fancy edging if you desire as well. If you made a design to go on top go ahead and place that and make a few slits into the pie for ventilation during baking.

5. Preheat oven to 425°F.

6. Bake for 15 mins, then decrease oven temperature to 350F and back for 30 min, or until crust is golden brown. If you find your crust browning too quickly, cover it loosely with tin foil!


Teriyaki Turkey Tenderloins

I decided we had not had Turkey in a great while so it was time t hunt for a recipe and cook on up! I found this Teriyaki recipe in my Better Homes and Garden book and thought it sounded good. ...and boy, it was! My husband AND son devoured it, and I have given it great marks in the margins of the cook book. A keeper for sure...


Recipe:
1 lb Turkey breast tenderloins
1/4 Cup Soy sauce
2 Tbs Packed Brown Sugar
2 Tbs Lemon Juice
1 Tbs Cooking Oil
1 Tsp Ginger
1 Clove garlic, minced

1. Place turkey tenderloins in a resealable plastic bag and set in a shallow dish. For marinade, in a small bowl combine soy sauce, brown sugar, lemon juice, oil, ginger and garlic. Pour marinade over turkeyl seal bag. Marinate in the refrigerator for 1 to 2 hours, turning once.

2. Now it listed in the recipe for cooking this:
For a charcoal grill, grill turkey on the rack of an uncovered grill directly over medium coals for 16 to 20 mins or until turkey is no longer pink (170F), turning once and brushing with marinade halfway through cooking. (for a gas grill, preheat grill. reduce heat to medium. Place turkey on grill rack over heat. Cover and grill as above.

3. What I did:
I turned my broil on hot, layered my pan (edged cookie sheet) with tin foil. Placed my tenderloins on, and poured marinade from bag over turkey. Set the oven rack on highest setting (close to heat coils) and placed them in the oven. I broiled for 7 mins, took out and flipped turkey, and placed back in oven for another 7 mins. They were perfect, and tasted fantastic!

:) Good luck~

Homemade Pumpkin Pie and Crust

You know that you're over summer when you really start craving some Fall recipes... like Pumpkin pie! Yum! I got on a pie kick last week and made this and a few days later made a Cherry Pie with a different crust recipe. Both turned out stupendous and something I would certainly make again and again. Unfortunately my husband, Don ate them both before I had time to eat more than one slice. He covers his glutenous behavior by saying you can't expect to eat a piece every other day (which is what I do)...you have to have multiple pieces (with whipped cream and or ice cream) everyday. Ha! Good thing he exercises...


Single Pie Crust Recipe:
1 -1/4 Cup all purpose flour
1/4 tsp salt
1/3 Cup Shortening (see pictures for trick)
4 to 5 Tbs Cold Water

1. In a medium bowl stir together flour and salt. Blend in shortening until pieces are pea-sized.

I have done this for years and it has saved me a lot of messy cleaning. If I have to measure out ingredients like butter, shortening, peanut butter, etc. That is oily and sticky I will always take some plastic wrap and place it over my measuring cup. Then you simply fill it in, plop it out and put back your clean cup! :)
----------------------------------------------------------------------------------
2. Sprinkle 1 Tbs of water over part of the flour mixture; gently toss with a fork. Push moistened dough to the side of the bowl. Repeat moistening flour mixture, using 1 Tbs of the water at a time, until all the flour mixture is moistened. Form dough into a ball.

3. On a lightly floured surface, (or on parchment paper, which is what I did) use your hands to slightly flatten dough. Roll dough from center to edges into a circle about 12 inches in diameter.

4. To transfer pastry, you can either wrap it around the rolling pin and unroll the pastry into a 9-inch pie plate. Ease the pastry into pie plate without stretching it. OR, if you did it on parchment paper, you can simply put the pie plate over the rolled out dough and then with your hand under the parchment paper, flip it right side over. Then gently ease the dough into the plate, flattening it out on the bottom and around the edges.
5. Now trim the edges, or dazzle them up - your choice :)
(Note: I did not roll my out big enough. You can see toward the bottom I did not have enough crust to go all the way up..... roll out thinner next time!)
--------------------------------------------------------
Pumpkin Pie Recipe:

3/4 cup white sugar
1 teaspoon ground cinnamon
1/2 teaspoon salt
1/2 teaspoon ground ginger
1/4 teaspoon ground cloves
2 eggs
1 (15 ounce) can Libby's Pumpkin
1 (12 ounce) can Evaporated Milk

1. Preheat oven to 425 degrees F.
2.Combine sugar, salt, cinnamon, ginger and cloves in small bowl. Beat eggs lightly in large bowl. Stir in pumpkin and sugar-spice mixture. Gradually stir in evaporated milk. Pour into your awesome pie shell.
3.Bake for 15 minutes. Reduce temperature to 350F.; bake for 40 to 50 minutes or until knife inserted near center comes out clean. Cool on wire rack for 2 hours. Serve immediately or refrigerate. (Do not freeze as this will cause the crust to separate from the filling.)

Potato Rolls

You think I have a bread addiction? You should see my husband when I make a batch of these moist rolls! The ever so popular and best loved *Potato Rolls!* I had never made nor had these before, but my husband started to rant happily about how delicious they are and that he grew up with them. I am not a big potato fan, but gave them a try for my dear Don's sake...

They were FANTASTIC! I have made them at least 4 times since... wonderful! moist! tasty! They were so good that Don (my husband) did not want to put anything on them, or even dip them in the roast I had made. Now that's saying something about these little guys!

Recipe:
4-4.5 Cups of all purpose flour
1 pkg active dry yeast (I use the jar, 1 Tbs)

1 Cup Milk

1/4 Cup Water

1/4 Cup Sugar
1/4 cup Shortening
1.5 tsp Salt

1 beaten egg
1/2 cup mashed potato


1. First off, get yourself a nice potato. Peel, and cut into quarters, and boil for about 25 mins. Afterward mash up and measure out and even 1/2 cup.

2. Combine 2 cups of flour and the yeast. Heat and stir milk, water, sugar, shortening and salt just until warm (120-130F) and shortening almost melts; add to flour mixture along with egg and mashed potato. Beat with an electric mixer on low speed for 30 seconds, scraping bowl. Beat on high speed for 3 mins. Stir in as much of the remaining flour as you can.

3. Knead in enough of the remaining flour to make a moderately stiff dough that is smooth and elastic. Shape dough into ball and place in a lightly greased bowl (turning to grease surfaces)-- cover and let rise until double in size. (about 1 hour).

4. Pre-heat oven to 375F and lined a cookie sheet with parchment paper. Punch down your dough and then tear portions off and roll into a ball. Place rolled balls on cookie sheet and allow to rest for 10 mins. (note: the first I made these I made fairly large balls and they were wonderful and moist -- the second time around I wanted to make a lot and made the balls smaller, they were still good - but not as moist...so go with large!) I made about 12 large rolls.

5. Place in oven and cook for approx. 11 mins.

6. Let the drooling begin! :) Enjoy~

Marble Bread

Okay it is no secret on my blog that I L-O-V-E bread - so naturally I have been experimenting with different breads and have only begun to slightly branch out. I have a couple foreign breads to try soon, so be on the look out!

This is the "Marbled Loaf" - which is kinda eye catching and impressive looking. It is made with a combination of white bread dough (divided in half) with molasses and whole wheat flour being added to the half. It is fun, and takes not much more time than a normal loaf of bread. Plus who can resist this delicious, warm snack? Whip out a cup of buter, mix a 1/4 cup of honey into it and go to town on this bad boy! Yummmmmm

Recipe:
3 to 3.5 Cups of all purpose flour
1 pkg active dry yeast (I use the jar, scoop 1 Tbs)
1.5 Cups Milk
2 Tbs Sugar
2Tbs Cooking Oil
1.5 tsp salt
2 Tbs Dark-flavored Molasses
1 and 1/4 Cup Whole Wheat flour (or you can try rye)

1. In a large maxing bowl combine 2 cups of the all purpose flour and the yeast. In a saucepan heat milk, sugar, oil and salt just to warm (120-130F). Add milk moxture of flour mixture. Beat with an electric mixer on low to medium speed for 30 seconds, scraping bowl constantly. beat on high speed for 3 mins.
(((((truth to be told, I NEVER do this. haha - I do everything by hand, stirring slow and vigorously for about 1 min. with an over sized fork)))))

2. Divide batter in half. (okay, so I made this probably harder than it needed to be, but I really wanted to measure half of the batter) So I poured everything into a glass measuring cup (large 4 cup type size) and then divided it up from there. I believe it always comes out of be 2 cups worth total. So to save you time, just dip out 1 cup of your batter into another bowl. No need for extra measuring....because I am just that nice, and did the work for you. :D

3. To 1 portion of batter, stir in as much of the remaining all purpose flour as you can. (**START SLOW!**) Knead in enough of the flour to make a moderately stiff dough that is smooth and elastic. Shape into a ball and place in a greased bowl, turning around to grease the surfaces. Cover and allow to rise in a warm dry place.

4. To other portion of batter stir in molasses, and wheat flour -- and then any extra white flour to make it a moderately stiff, smooth and elastic dough as well. Now do same as above, -- shape into a ball, put in a greased bowl and allow to rise. (1-1.5 hours to rise...go do something productive while you wait! :)

5. Punch both portions down, cover and let rest 10 mins. Meanwhile, lightly grease an 8x4x2 inch loaf pan; set aside.

6. On a lightly floured surface roll each dough portion into an approximate 12x8 inch rectangle. Place dark dough on top of light dough. Roll up and place seam side down into loaf pan. Cover and let rise until nearly double (30-40 mins....get back to being productive!)


7. Bake into a preheated 375F oven for 30-35 mins or until bread sounds hollow when lightly tapped. If you notice the bread getting too brown for your liking cover the top loosely with tin foil. When done immediately remove from pan and cool on a wire rack.

Fantastic Job Y'all! Now go mix your butter and honey and indulge!!! Yummmmy~

Chili Pasta Skillet

At the end of each month I try and print off a calendar (has some nice printable free ones "here") and fill eachday with a potential dinner. It takes the guess work out of my day and I can go to the grocery store once a week to get all the ingredients I need. I have found this to not only cut down on traveling, and the hassle of lugging my spunky kid through the aisles in a cart, but overall it saves money! I recommend highly...

SO, while I was in one of my planning moods and writing out the rest of September meals, I came across this one that sounded interesting, and had little prep time! I gave it a shot, and it was not half bad. Not fantastic, but not bad. ...and be prepared, it makes a lot! We ate it and thought "okay, that was different (with the pasta in it)" and thought nothing much of it. I had it a few times as a left over for lunch and you know what? It is much better as a leftover! (to me at least). Scoop it out and warm it up, sprinkle some cheese, plop a little sour cream and grab a hand full of tortilla chips. Not too bad at all...


Recipe:
1 lb Lean Ground Beef
3/4 Cup Chopped Onion
1 (15-15.5oz) Can of Black, Red, or Kidney beans
1 (14.5oz) can of diced Tomatoes, undrained
1 (8oz) can of Tomato Sauce
1 (4 oz) can Diced Green Chile Peppers, drained
1 Cup Elbow Macaroni (4 oz)
2 to 3 tsp Chili Powder
1/2 tsp Garlic salt
1/2 Cup of Shredded Cheese

1. In a large skillet cook mean and onion until meat is brown and onion is tender. Drain off fat.


2. Stir in beans, undrained tomatoes, tomato sauce, chile peppers, macaroni, chili powder, and garlic salt. Bring to boiling; reduce heat. Simmer, covered (I did not have a big enough cover, so left without) about 20 mins, or until macaroni is tender, stirring often.

3.Remove from heat; sprinkle with cheese/ Cover and let stand for about 2 mins, or until cheese melts.
(note: without cheese on)

That's it! You're done friend! Now try it with the yummy cornbread recipe below this post! :-)

Sunday, September 11, 2011

Sweet n' Moist Corn bread

This recipe brings back a lot of memories, as it is one that I grew up with. Mom would ALWAYS make this when she made chili. It is not a grainy crumble corn bread, which I don't care for anyway - this is a melt in your mouth, give me another *please*, moist bread. Mmmmm Enjoy!

Recipe:
2 Cups of Bisquick
1/2 Cup Yellow Cornmeal
1 tsp Baking Powder
1/2 Cup Sugar
1 Stick (half cup) Butter

1 Cup Milk

2 Eggs

Pre-heat oven to 350F.

1) Blend All the above ingredients together and pour into a 8x8 dish.

2) Lick Spoon. (I think the batter tastes YUMMY...mmmmm) ;-P

3) Cook for about 30-35min. Take Cornbread out of oven and stick a toothpick or knife in the center, if it pulls out gooey cook for an additional 3-5 mins -- if it comes out clean pat yourself on the back, because you are awesome!

4) Serve warm plain, or with butter and or honey. Enjoy!


(I Made This Bread to go with the above post "Chili Pasta Skillet" )


Sunday, August 7, 2011

Creamy Meatballs

My son Carter is a pretty decent meat eater (for a 20 month old). I was thawing out 1lb of meat for Sloppy Joes and realized I did not have any seasoning left. The meat was already soft, so I thought I might try my hand at a nice creamy meatball recipe. The outcome was very yummy, and Carter ate it up! This of course is a victory for any mom out there trying to feed a toddler. ** KID APPROVED** Very quick recipe, only 3 ingredients! Serves up great over plain pasta noodles (not spaghetti type meatball) or by themselves with a salad and potatoes.

Recipe:
1 lb of ground beef or ground turkey
1 can of Cream of Mushroom
1 package of Liptons Onion soup mix

1. Roll your meat into desired ball size, and place in a skillet. Brown each side, then cook fully (browning first helps keep your meatballs in round shape, before you move them around a lot while thoroughly cooking)

2. Add in your can of Cream of Mushroom, and your package of Onion soup mix (adding the proper water amount as stated with the mix)

3. Mix and turn on medium/low heat. Allow mixture to thicken and then turn to simmer.

YOUR DONE! Wow, awesome... enjoy the tastiness you just created. :)

Saturday, August 6, 2011

Flash back recipe

We had some friends over one night for treats and Wii game playing. I decided to not venture off into any new and foreign recipes - so I made previously tried and loved yummy bunny goods. Click the name to be directed to the post with recipe. :)


Stuffed Pepper Guts


So, I am sure you have heard of stuffed peppers - right? Well, this is the same, just with out the stuffing of a pepper. I use to always buy about 5 green peppers, slice off the tops, wash and clean out the insides and load them up with the meat mixture, place in a dish and bake. I found however, that we never ate the pepper, just carved it out and discarded. What a waste! So now I save a little money, and effort and still get the pepper yumminess. Here is my easy way:


Recipe:
1 lb ground beef or ground turkey
1 green bell pepper
Finely shredded Colby and Monterey Jack cheese
1 Jar (24 oz) of Prego Sauce (I use garden variety)

1 Cup of White Rice
1 large skillet

1. Get your rice cooking first, as it takes the longest. Use a rice cooker or stove top. (remember, 2:1 ratio... 2 cups of water or 1 cup of rice -- boil, then cover/simmer)

2. Cut off the pepper ends, discard then slice up into the rest into fine pieces. Cook meat in skillet, halfway through adding the peppers - when cooked fully drain fat out.


(picture without rice added)

Now place back on burner and add the whole jar of Prego Sauce, and most of the cooked white rice. Mix around and turn to a low/swimmer. Add cheese, or allow your family/guest to serve their desired amount when dished up.
((*NOTE: If your skillet is not large enough to manage the amount, transfer the meat to a large pot, then add sauce/rice..and place on stove burner**))

Yes, you're done! It was that easy! Goes great with some home made bread sticks too! Yum Yum Yum~

Breadsticks

This recipe is so tasty next to a large plate of spaghetti or stuffed peppers guts. YUM! It is a quick bread, so no hour+ waiting for dough to rise - just about 5 minuets to make sure the yeast activates. Super Simple, Super Delicious!


Recipe:
1 Tbs Dry yeast (or 1 package of dry yeast)
1 Cup warm water (~110F)
1 Tbs Sugar
3.5 Cups of Flour (give or take a little...start off with 3, then add)
2 Tbs Olive Oil
1 tsp Salt

Put 1 cup of water into a tall dish or bowl, add the sugar and yeast. Stir around gently and then let rest. Your yeast (if good) should activate. You can tell because a nice foam will grow on top of the water. If this does not happen, try again. Yeast will not activate if water is too cold, and will die if water is too hot. (and sometimes, you just get a bad batch of yeast, might be old). When this is done add the yeast mixture to your flour and combine with the salt and olive oil. Mix around the best you can with a large fork or wooden spoon. Now flour your hands up and knead the dough until it is smooth, round and soft.

Place a sheet of parchment paper over a flat cookie sheet and place your dough ball into the center. Roll the dough out into a big "pizza" circle. (I often tear another sheet of parchment paper off and place it on top of my dough, then use a rolling pin to flatten - it saves it from sticking to my rolling pin, and saves me from having to wash another dirty utensil. -- sprinkle the dough with some flour before though!)

Now you can either move right along with the yummy breadstick making process, or leave dough to relax for about 10 mins. This will allow it to settle and grow some in height. Now what you want on your bread stick is up to you. My normal process is this:

1. Spread thin layer of butter over the top (raw dough, still....have not baked it yet!)
2. Sprinkle Garlic salt and powder over the top, then if handy, sprinkle garlic bread seasoning over the top as well.
3. Sprinkle Parmesan cheese powder
4. Sprinkle finely shredded Parmesan cheese
5. Sprinkle finely shredded Colby and Monteray Jack cheese
6. Crush and sprinkle parsley leaves over the top.
(note: I forgot the parsley in my picture...sorry - the green gives it a nice finished look)
-- I often spread "Italian Seasoning" mixture over as well. Just don't overdo the flavors, moderation people! Moderation...


Okay now that you have this fine looking raw circle in front of you - shove it into the over! 350F for about 17 mins. Just watch for done-ness. The bread should rise and fluff up, and the cheese crust a little on the edges.

I hear the timer going off! Take it out!

Allow to cool.
Then using a knife, or preferably, a pizza cutter - slice the bread into long/short strips. and ..YAY! You're finished...and I bet it looks great. Enjoy~